![]()


A newsletter for Jellyfin to notify your users of your latest additions. Jellyfin Newsletter connects to the Jellyfin API to retrieve recently added items and send them to your users.
It is fully customizable and can be run on a schedule using a cron job or a task scheduler.
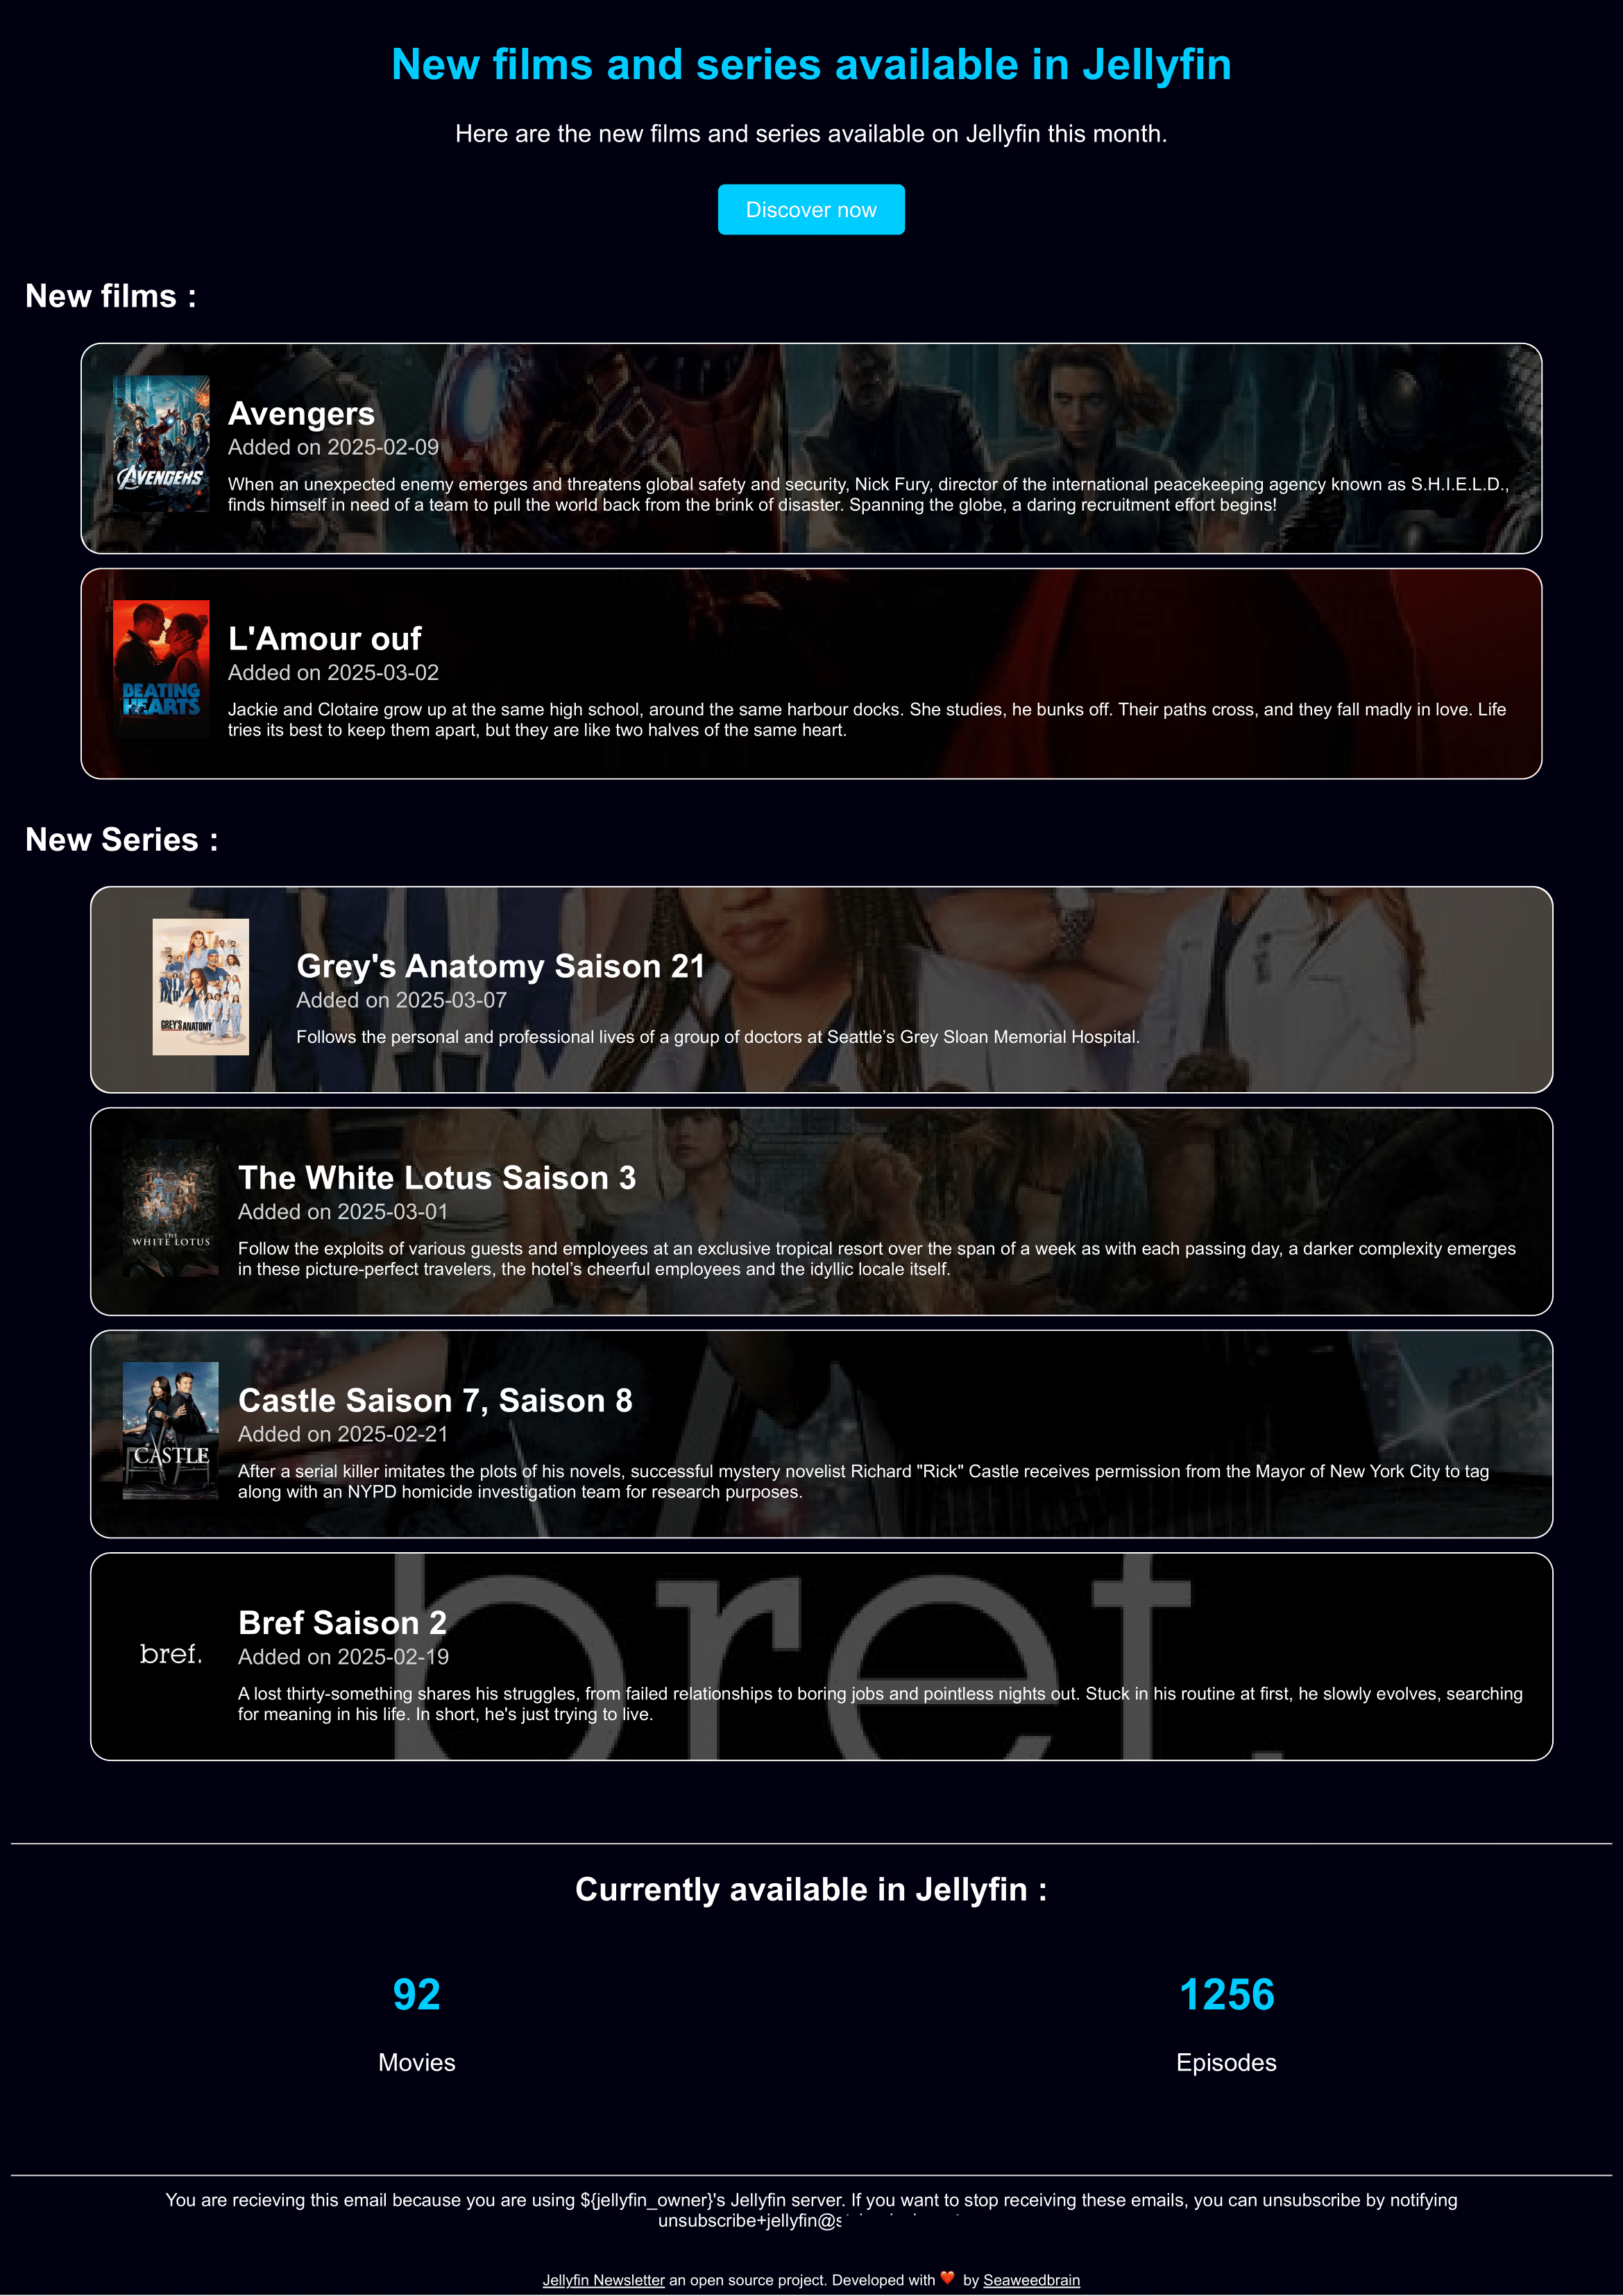
- What it looks like
- Features
- Recommended installation: Docker
- Current limitations
- License
- Contribution
- How to
- Retrieve the last added movies and TV shows from your Jellyfin server
- Send a newsletter to your users with the last added items
- Retrieve the movie details from TMDB, including poster
- Group TV shows by seasons
- Fully customizable and responsive email template
- Easy to maintain, extend, setup and run
- Support for English, French, and Hebrew (RTL-aware template)
- Configure the list of recipients
- Configure specific folders to watch for new items
- Docker
- Jellyfin API key - How to generate an API key
- A TMDB API key (free) - How to generate a TMDB API key
- A SMTP server
This is the default and recommended way to run the newsletter. The Docker container will run on a schedule using a built-in cron job. It will run on the schedule defined in the config/config.yml file.
- Download the docker-compose.yml file:
curl -o docker-compose.yml https://raw.githubusercontent.com/SeaweedbrainCY/jellyfin-newsletter/refs/heads/main/docker-compose.yml-
(optional) Edit the
docker-compose.ymlfile to change the default user or timezone. -
Create a
configfolder in the same directory as thedocker-compose.ymlfile:
mkdir config- Download the config file in the
configfolder:
curl -o config/config.yml https://raw.githubusercontent.com/SeaweedbrainCY/jellyfin-newsletter/refs/heads/main/config/config-example.yml
-
Edit the
config/config.ymlfile and fill in the required fields. All non-commented fields are required. -
Run the docker container with docker compose
docker compose up -dNote
Note: It is recommended to use a static version instead of latest, and manually upgrade. Last version
Use this method if you want to run the script on a schedule using an external cron job or task scheduler, instead of the built-in cron job. Docker will run once, and exit after sending the newsletter.
- Create a
configfolder.
mkdir config- Download the config file in the
configfolder:
curl -o config/config.yml https://raw.githubusercontent.com/SeaweedbrainCY/jellyfin-newsletter/refs/heads/main/config/config-example.yml
-
Edit the
config/config.ymlfile and fill in the required fields. All non-commented fields are required. -
Run the docker container to send the newsletter
docker run --rm \
    -v ./config:/app/config \
    ghcr.io/seaweedbraincy/jellyfin-newsletter:v0.10.0-dev.5
Note
Note: It is recommended to use a static version instead of latest, and manually upgrade. Last version
- Schedule the script to run on a regular basis.
# Unix :
crontab -e
# Add the following line to run the script every 1st of the month at 8am
0 8 1 * * root docker run --rm -v PATH_TO_CONFIG_FOLDER/config:/app/config/ ghcr.io/seaweedbraincy/jellyfin-newsletter:v0.10.0-dev.5- Email template translations are available for English, French, and Hebrew
- Only supports TLS for the SMTP server
- Only supports movies and TV shows for now
- Not available as a Jellyfin plugin yet
- Must be run manually or scheduled
This project is licensed under the AGPLv3 License—see the LICENSE file for details.
Feel free to contribute to this project by opening an issue or a pull request.
A contribution guide is available in the CONTRIBUTING.md file.
If you like this project, consider giving it a ⭐️.
If you encounter any issues, please let me know by opening an issue.
- Go to your Jellyfin dashboard
- Scroll to advanced section and click on API keys
- Click on the
+button to create a new API key - Fill in the required fields and click on save
- Copy the generated API key
- Paste it in the
config.ymlfile underjellyfin.api_token
- Go to the TMDB website
- Create an account or log in
- Go to your account settings
- Click on the API section
- Click on the
Createbutton to create a new API key - Copy the API key named "API Read Access Token"
- Paste it in the
config.ymlfile undertmdb.api_key