Python package that converts images into ASCII art for terminals and HTML.
Code based on ProfOak's Ascii Py.
- SwarmUI support: from_swarmui()
- Gemini support: from_gemini()
- to_image_file() stroke_width parameter
- Removed Stable Diffusion and DALL-E support (API no longer available)
- Optional image enhancement
- Removed Colorama dependency (no longer needed in the latest versions of Windows)
- to_image_file()
- to_character_list()
- print_palette()
- Removed Craiyon support (API no longer available)
- Craiyon support: from_craiyon()
- Stable Diffusion support: from_stable_diffusion()
- DALL-E support: from_dalle()
- Complete rewrite, full OOP, no longer compatible with 1.x
- Added support for foreground color
- to_html()
- OOP functionality
- to_file()
- First public release
pip install ascii_magic
from ascii_magic import AsciiArt

my_art = AsciiArt.from_image('moon.jpg')
my_art.to_terminal()
Result:
Install Colorama and run colorama.init() before printing to the console.
pip install colorama
import colorama
from ascii_magic import AsciiArt

my_art = AsciiArt.from_image('moon.jpg')
colorama.init()
my_art.to_terminal()This module's entire functionality is contained within the class AsciiArt, which has a collection class methods, such as AsciiArt.from_image(), that return AsciiArt objects with pictures from different sources: files, URLs, the clipboard, etc.
These objects have multiple methods, such as my_art.to_terminal(), that generate ASCII art pieces from the picture. These methods have parameters such as columns that allow you to change the appearance of the art piece.
For convenience, the module ascii_magic also exposes a collection of functions with the same name as the class methods mentioned above, which do exactly the same.
Example:
from ascii_magic import AsciiArt, from_image

# This:
my_art = AsciiArt.from_image('lion.jpg')
my_art.to_terminal()

# Does the same as this:
my_art = from_image('lion.jpg')
my_art.to_terminal()
This class is essentially a wrapper for a Pillow image. The property AsciiArt.image exposes the underlying Pillow object so you can manipulate it directly.
Example:
from ascii_magic import AsciiArt
from PIL import ImageEnhance

my_art = AsciiArt.from_image('lion.jpg')
my_art.image = ImageEnhance.Brightness(my_art.image).enhance(0.2)
my_art.to_terminal()Loads a cat picture from Cat as a Service with the default parameters and prints it to the terminal, allowing you to verify in a single line of code that everything is running O.K.
AsciiArt.quick_test() -> NoneExample:
from ascii_magic import AsciiArt

AsciiArt.quick_test()Creates an AsciiArt object from an image file.
from_image(path: str) -> AsciiArtParameters:
path (str): an image file compatible with Pillow, such as a jpeg or png
Example:
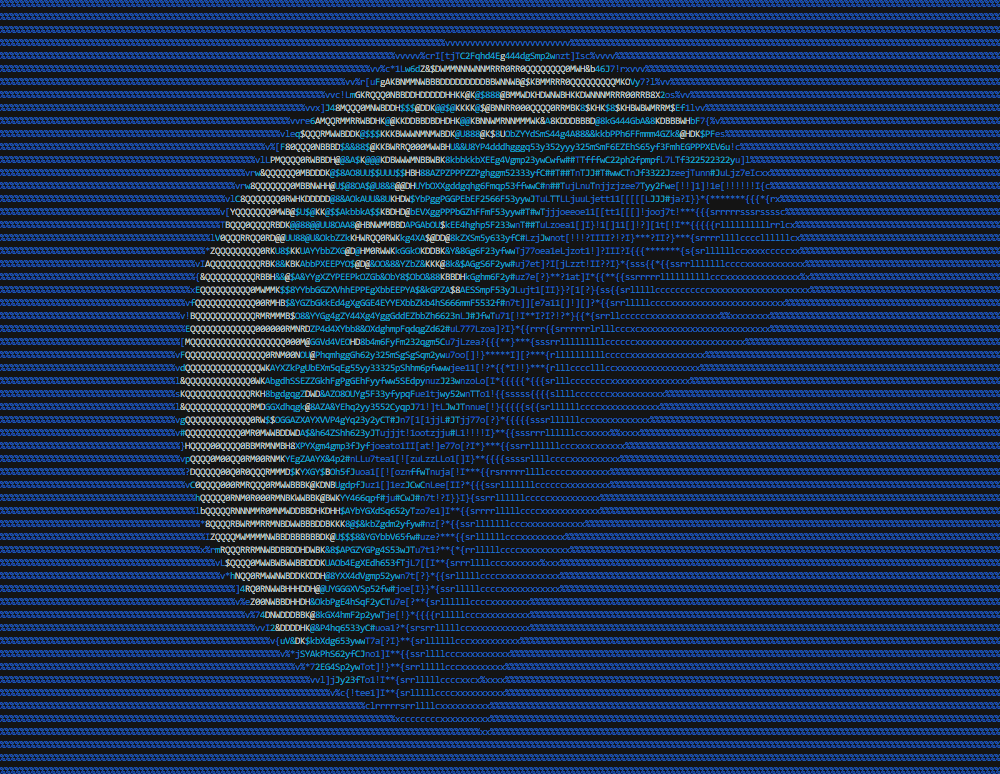
from ascii_magic import AsciiArt, Back

my_art = AsciiArt.from_image('lion.jpg')
my_art.to_terminal(columns=200, back=Back.BLUE)
Result:
Example:
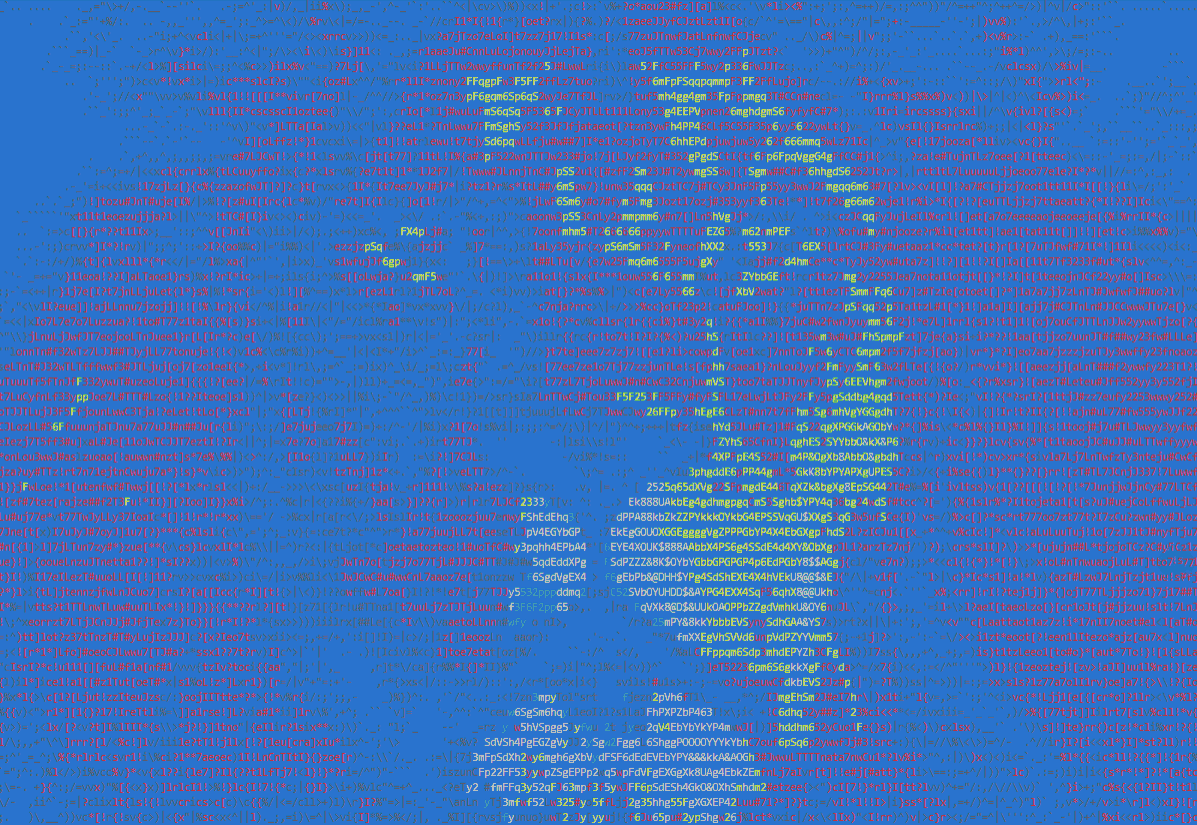
from ascii_magic import AsciiArt

my_art = AsciiArt.from_image('lion.jpg')
my_art.to_html_file('ascii_art.html', columns=200, width_ratio=2)
Result:
Example:
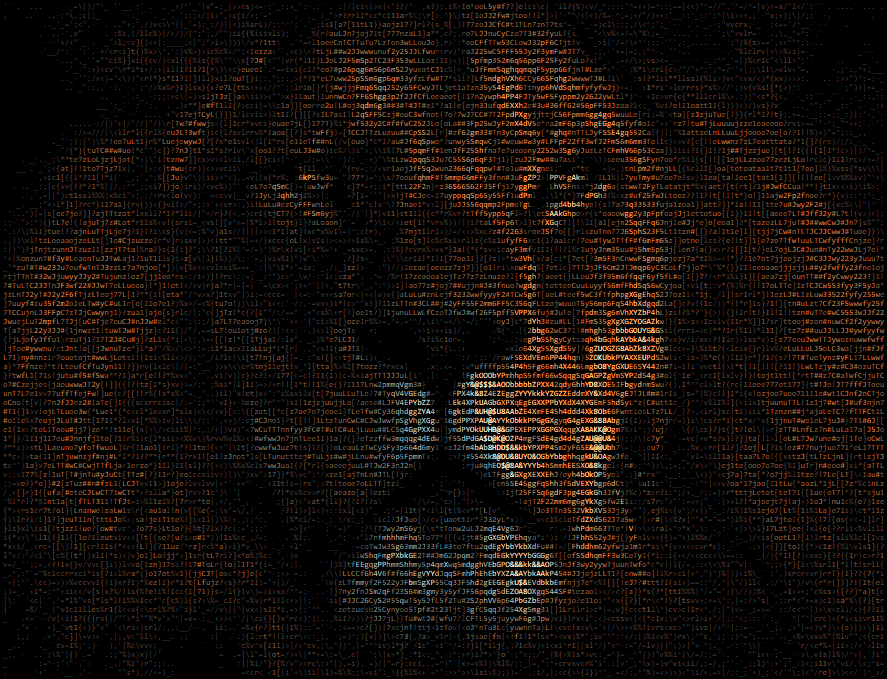
from ascii_magic import AsciiArt

my_art = AsciiArt.from_image('lion.jpg')
my_art.to_terminal(columns=200, monochrome=True)
Result:
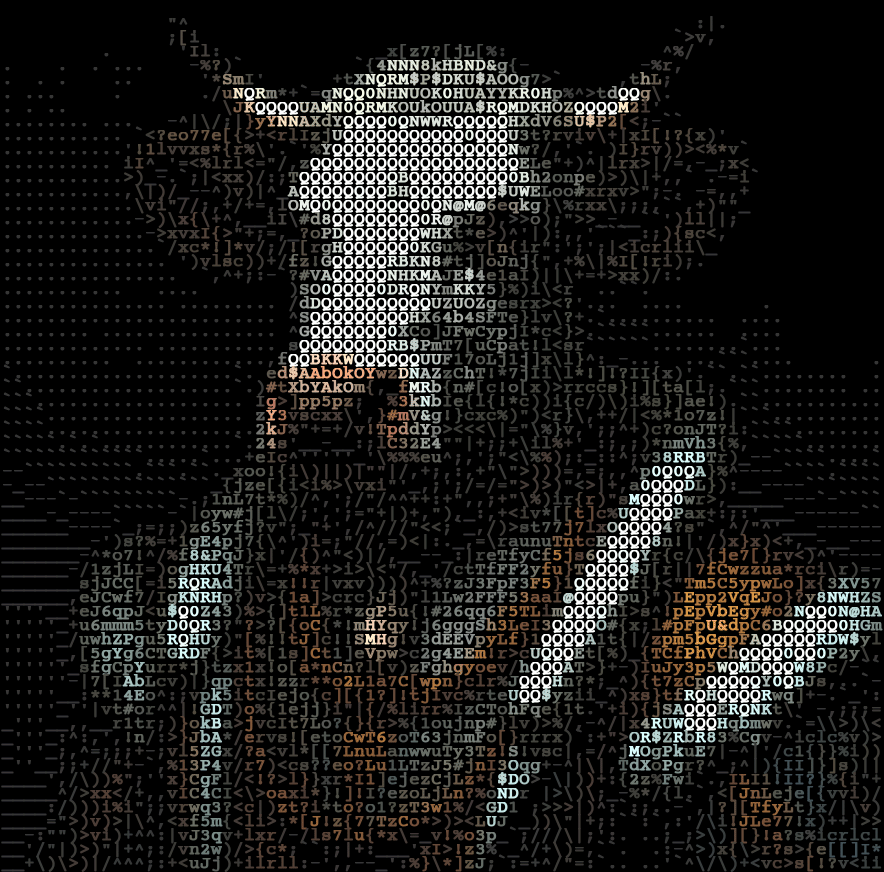
Creates an AsciiArt object with Gemini, a generative platform that can create realistic images from a description in natural language. Requires a free API key. The API key can be set in the environment variable GEMINI_API_KEY or passed as an argument.
from_gemini(
    prompt: str,
    model: str = 'gemini-2.0-flash-preview-image-generation',
    api_key: Optional[str] = None,
) -> AsciiArt
Parameters:
prompt (str): a description of an image in natural languagemodel (str, optional): the model to use for generationapi_key (str, optional): a Gemini API key
Example:
from ascii_magic import AsciiArt

api_key = 'aFaKeGeMiNiApIkEy'
my_art = AsciiArt.from_gemini('A portrait of a cow with noble clothes', api_key=api_key)
my_art.to_image_file('example_gemini.png', columns=80, full_color=True)
Result:
Creates an AsciiArt object from SwarmUI, a text-to-image user interface. Requires the URL of a SwarmUI instance, which is usually running on localhost, port 7801. The URL can be set in the environment variable SWARMUI_SERVER or passed as an argument.
from_swarmui(
    prompt: str,
    width: int = 1280,
    height: int = 720,
    steps: int = 20,
    raw_input: dict = {},
    model: Optional[str] = 'auto',
    server: str = 'http://localhost:7801',
) -> AsciiArt
Parameters:
prompt (str): a description of an image in natural languagewidth (int, optional): the width of the imageheight (int, optional): the height of the imagesteps (int, optional): the number of steps to generate the imageraw_input (dict, optional): additional raw input to pass to the SwarmUI APImodel (str | 'auto', optional): the model to use for generation, if 'auto', the first model will be usedserver (str, optional): the URL of a SwarmUI instance
Example:
from ascii_magic import AsciiArt

my_art = AsciiArt.from_swarmui(
    'A portrait of a cow with noble clothes',
    width=640,
    height=480,
    steps=50,
    raw_input={
        'seed': 42,
        'cfgscale': 8.0,
        'negative_prompt': 'low quality, pixelated, blurry',
    },
    server='http://localhost:12345'
)
my_art.to_image_file('example_swarmui.png', full_color=True)Creates an AsciiArt object from an image URL. Raises an urllib.error.URLError if something goes wrong while requesting the image, but you can also catch it as an OSError if you don't want to import urllib into your project.
from_url(url: str) -> AsciiArtParameters:
url (str): an URL which will be loaded via urllib (supports redirects)
Example:
from ascii_magic import AsciiArt

try:
    my_art = AsciiArt.from_url('https://cataas.com/cat')
except OSError as e:
    print(f'Could not load the image, server said: {e.code} {e.msg}')
my_art.to_terminal()Creates an AsciiArt object from the contents of the clipboard. Raises an OSError if the clipboard doesn't contain an image. Requires PyGObject under Linux.
from_clipboard() -> AsciiArtExample:
from ascii_magic import AsciiArt

try:
    my_art = AsciiArt.from_clipboard()
except OSError:
    print('The clipboard does not contain an image')
my_art.to_terminal()Creates an AsciiArt object from an image object created with Pillow. This allows you to handle the image loading yourself.
from_pillow_image(img: PIL.Image) -> AsciiArtParameters:
img (obj): an image object created with Pillow
Example:
from ascii_magic import AsciiArt
from PIL import Image

img = Image.open('lion.jpg')
my_art = AsciiArt.from_pillow_image(img)
my_art.to_terminal()Prints the entire 8-color palette to the console.
Example:
from ascii_magic import AsciiArt

AsciiArt.print_palette()An AsciiArt object created as explained above has a collection of methods, such as to_ascii(), that allows you to create and display ASCII art pieces. All of them return a string, and some have additional functionality, as described below.
Returns a string containing ASCII art and, by default, control characters that allows most terminals (also known as shells) to display color.
The module ascii_magic exposes two enums to handle color: Front and Back which allow you to select terminal-compatible colors.
AsciiArt.to_ascii(
    columns: int = 120,
    width_ratio: float = 2.2,
    char: Optional[str] = None,
    enhance_image: bool = False,
    monochrome: bool = False,
    front: Optional[Front] = None,
    back: Optional[Back] = None,
) -> str
Parameters:
columns (int, optional): the number of characters per row, more columns = wider artwidth_ratio (float, optional): ASCII characters are not squares, so this adjusts the width to height ratio during generationchar (str, optional): specifies one or more characters sorted by brightness, such as ' .$@'enhance_image (bool, optional): if set to True, enhances the image before generating ASCII artmonochrome (bool, optional): if set to True, completely disables colorfront (enum, optional): overrides the foreground color with one of:Front.BLACKFront.REDFront.GREENFront.YELLOWFront.BLUEFront.MAGENTAFront.CYANFront.WHITE
back (enum, optional): sets the background color to one of:Back.BLACKBack.REDBack.GREENBack.YELLOWBack.BLUEBack.MAGENTABack.CYANBack.WHITE
Example:
from ascii_magic import AsciiArt, Back

my_art = AsciiArt.from_image('lion.jpg')
my_output = my_art.to_ascii(columns=200, back=Back.BLUE)
print(my_output)
Result:
Identical to AsciiArt.to_ascii(), but it also does a print() of the result, saving you one line of code ;)
Identical to AsciiArt.to_ascii(), but it also saves the result to a text file.
AsciiArt.to_file(
    path: str,
    # ... same parameters as AsciiArt.to_ascii()
) -> str
Parameters:
path (str): the output file path
Example:
from ascii_magic import AsciiArt

my_art = AsciiArt.from_image('lion.jpg')
my_art.to_file('lion.txt', monochrome=True)Returns a string with ASCII art created as HTML markup. Accepts the same parameters as AsciiArt.to_ascii(), except for back and front colors. By default the HTML ASCII art is generated with a 24-bit palette (16 million colors).
AsciiArt.to_html(
    full_color: bool = True,
    # ... same parameters as AsciiArt.to_ascii(), except back and front colors
) -> str
Parameters:
full_color (bool, optional): if set to False, limits color palette to 8 colors
Example:
from ascii_magic import AsciiArt

my_art = AsciiArt.from_image('lion.jpg')
my_html_markup = my_art.to_html(columns=200)Identical to AsciiArt.to_html(), but it also saves the markup to a barebones HTML file inside a <pre> tag with a bunch of default CSS styles that you can easily open in your browser.
AsciiArt.to_html_file(
    path: str,
    styles: str = '...',  # See description below
    additional_styles: str = '',
    auto_open: bool = False
    # ... same parameters as AsciiArt.to_html()
) -> str
Parameters:
path (str): the output file pathstyles (str, optional): a string with a bunch of CSS styles for the<pre>element, by default:- display: inline-block;
- border-width: 4px 6px;
- border-color: black;
- border-style: solid;
- background-color: black;
- color: white;
- font-size: 8px;
additional_styles (str, optional): use this to add your own CSS styles without removing the default onesauto_open (bool, optional): if True, the file will be opened withwebbrowser.open()
Example:
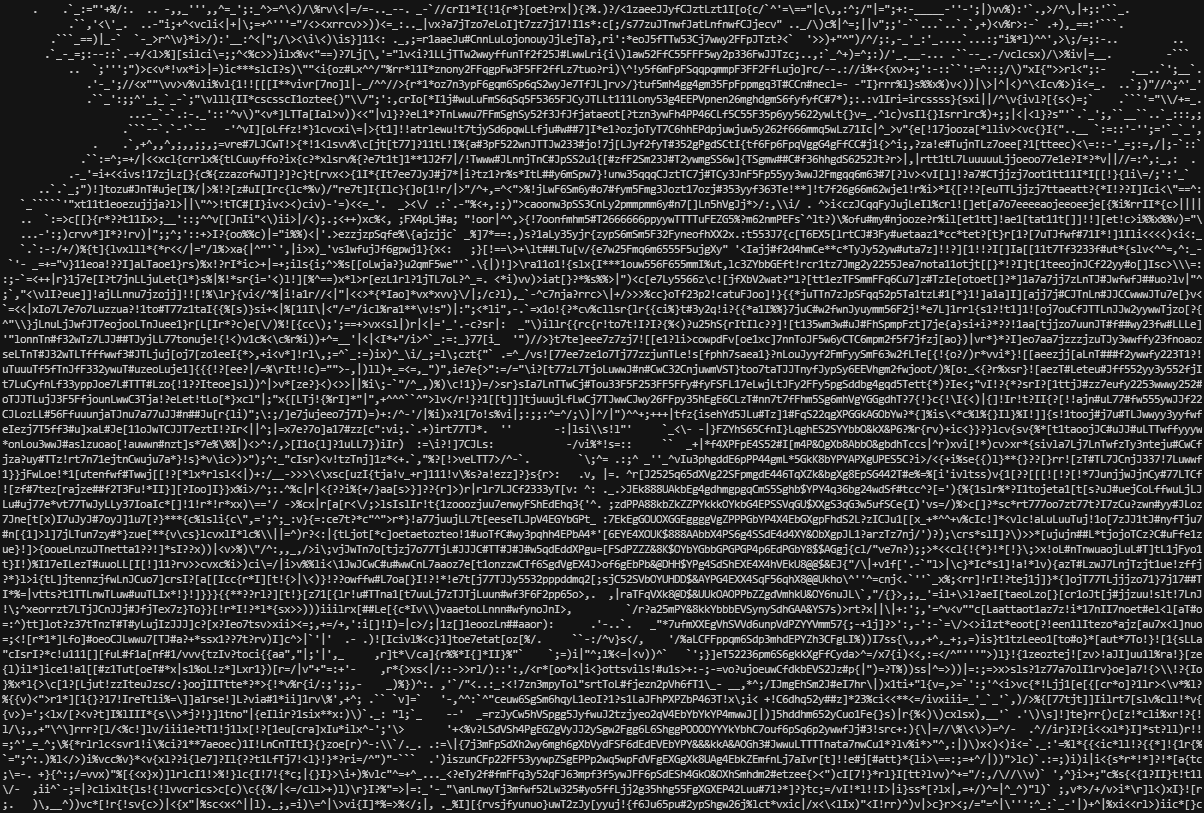
from ascii_magic import AsciiArt

my_art = AsciiArt.from_image('lion.jpg')
my_art.to_html_file('lion.html', columns=200, additional_styles='font-family: MonoLisa;')
Result:
Generates a image file with the resulting ASCII art. Accepts the same parameters as AsciiArt.to_ascii(). By default the ASCII art is generated with a 24-bit palette (16 million colors). If both width and height are set to auto, no resizing will be performed. If width or height is set to 'auto', the output will be resized proportionally. If both width and height are specified, the output will be resized to the specified dimensions, ignoring aspect ratio. Returns a 2d character list (see to_character_list() below).
AsciiArt.to_image_file(
    path: str,
    width: int | 'auto' = 'auto',
    height: int | 'auto' = 'auto',
    border_width: int = 2,
    stroke_width: float = 0.5,
    file_type: 'PNG'|'JPG'|'GIF'|'WEBP' = 'PNG',
    font: str = 'courier_prime.ttf',
    width_ratio: float | 'auto' = 'auto',
    char: Optional[str] = None,
    enhance_image: bool = False,
    monochrome: bool = False,
    full_color: bool = False,
    front: Optional[str] = None,
    back: str = '#000000',
) -> list[list[dict]]
Parameters:
path (str): the output file pathwidth (int | 'auto', optional): the width of the imageheight (int | 'auto', optional): the height of the imageborder_width (int, optional): the width of the border around the entire imagestroke_width (float, optional): the width of the stroke around the charactersfile_type (str, optional): the file type of the image, must be one of 'PNG', 'JPG', 'GIF', 'WEBP'font (str, optional): the font to use for the imagewidth_ratio (float | 'auto', optional): the width ratio of the image, if 'auto', it will be calculated based on the fontchar (str, optional): specifies one or more characters sorted by brightness, such as ' .$@'enhance_image (bool, optional): if set to True, enhances the image before generating ASCII artmonochrome (bool, optional): if set to True, completely disables colorfull_color (bool, optional): if set to True, uses the full color palette (16 million colors), otherwise uses the terminal color palette (8 colors)front (str, optional): overrides the foreground color with a hex color (e.g. '#00FF00')back (str, optional): background color (default: '#000000')
Example:
from ascii_magic import AsciiArt

my_art = AsciiArt.from_image('lion.jpg')
my_art.to_image_file('lion_output.png')Generates a 2d character list where each character is an object that contains the character, the terminal color, the terminal hex color, and the full hex color.
AsciiArt.to_character_list(
    full_color: bool = False,
    # ... same parameters as AsciiArt.to_ascii()
) -> list[list[dict]]
Parameters:
full_color (bool, optional): if set to True, uses the full color palette (16 million colors), otherwise uses the terminal color palette (8 colors)
Example:
from ascii_magic import AsciiArt

my_art = AsciiArt.from_image('lion.jpg')
my_character_list = my_art.to_character_list(columns=60)
print(my_character_list)
Output:
[
    [
        { 'character': 'o', 'terminal-color': '\x1b[31m', 'terminal-hex-color': '#FF0000', 'full-hex-color': '#FF3742' },
        { 'character': '%', 'terminal-color': '\x1b[33m', 'terminal-hex-color': '#FF00FF', 'full-hex-color': '#FF43AA' },
        { 'character': '#', 'terminal-color': '\x1b[31m', 'terminal-hex-color': '#FF0000', 'full-hex-color': '#FF3742' },
        # ...
    ],
    # ...
]With pytest installed, run it inside ascii_magic/tests/.
Copyright (c) 2020 Leandro Barone.
Usage is provided under the MIT License. See LICENSE for the full details.